Can you paint fabric on chairs? Will it hold up? What method to use? How to do?
In this post I’ll talk about 3 techniques of how I paint my fabric chairs… I paint my fabric chairs, yes I do 🤗
I’ve been a little addictive to transforming chairs lately. From old wooden school chairs to beautiful armchairs, I just love restyling them, giving them a quirky and unique outfit.
Most of the times I also use decoupage paper to embellish them.
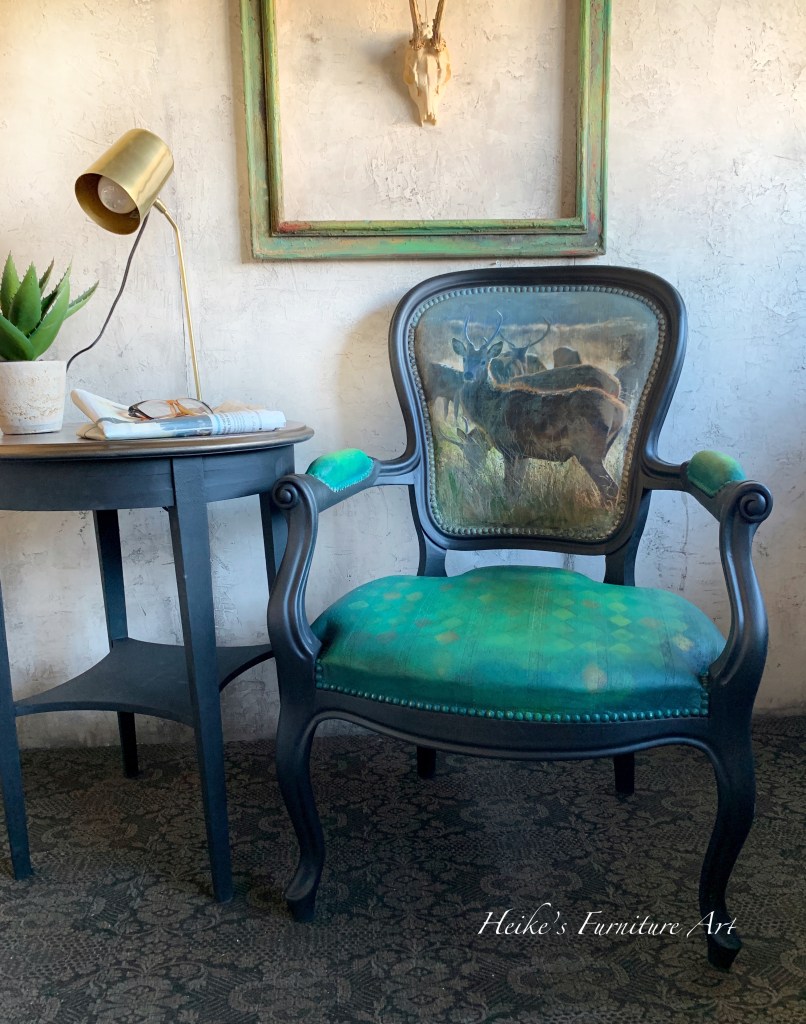
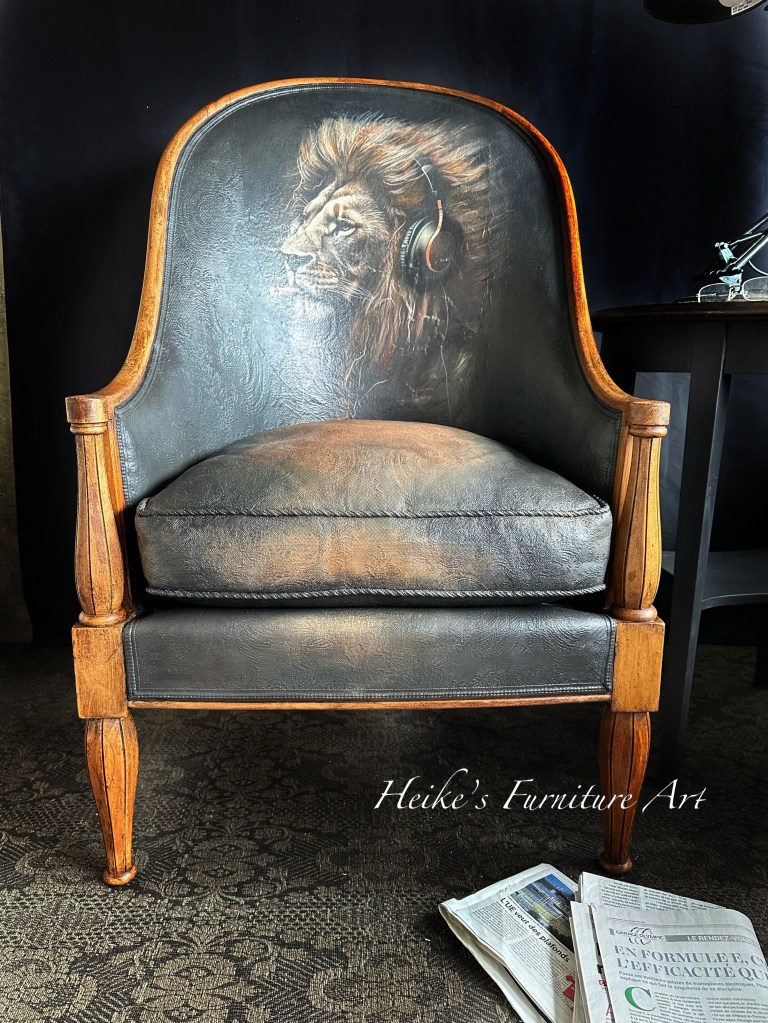
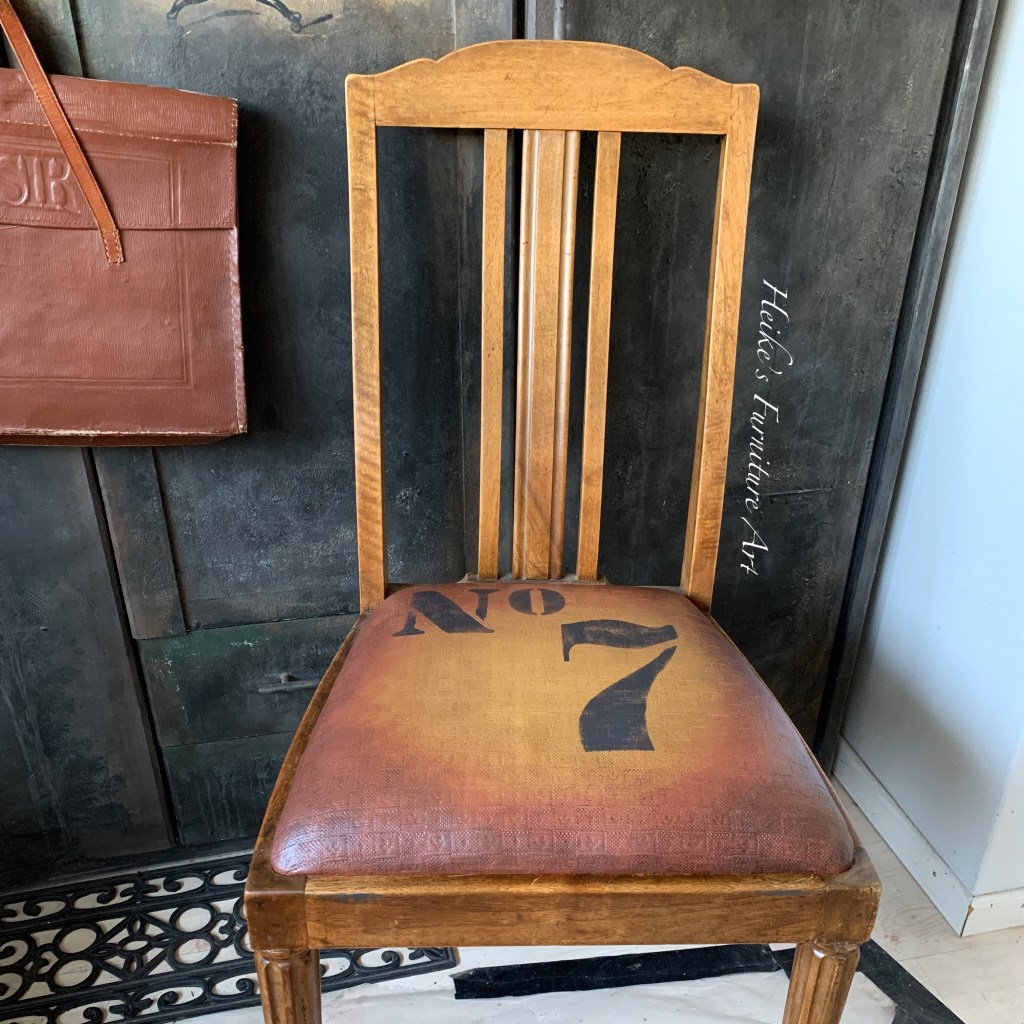
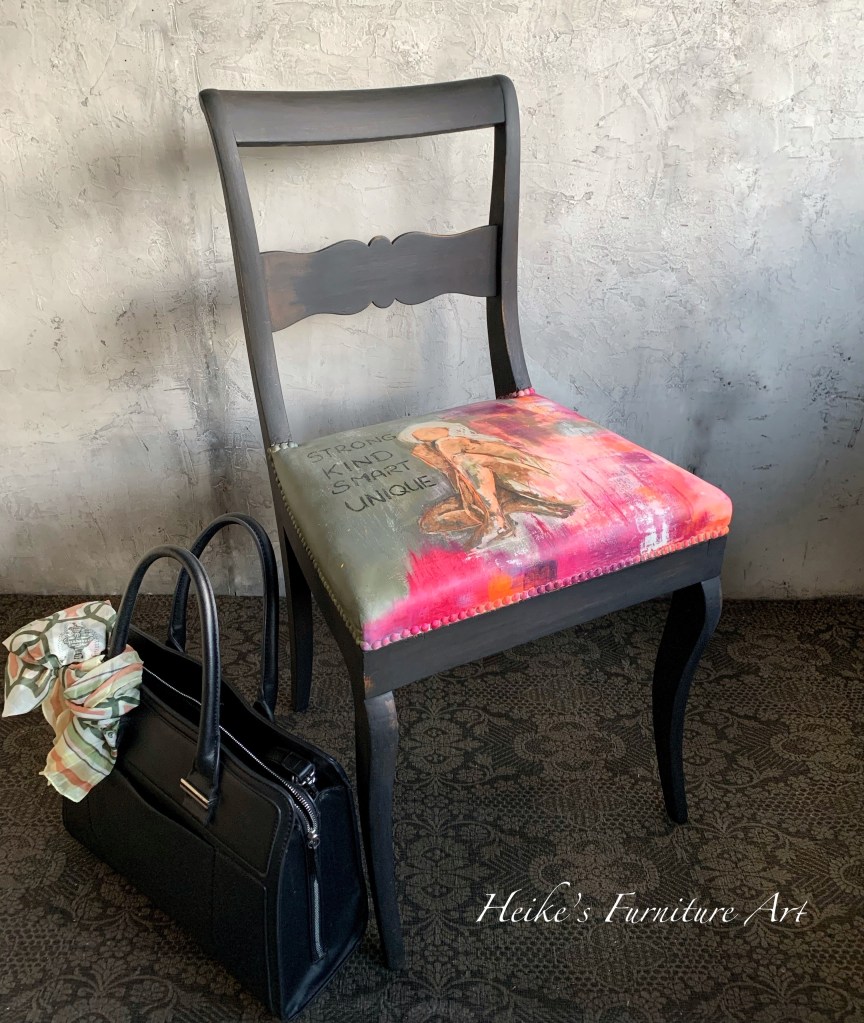
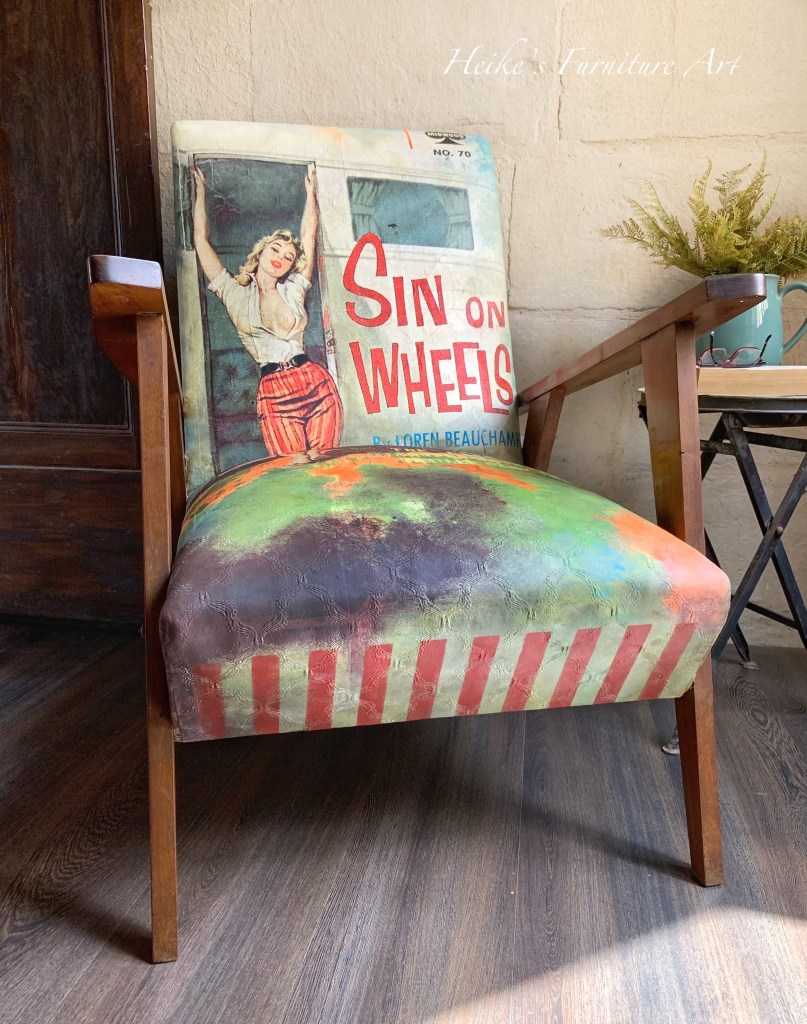
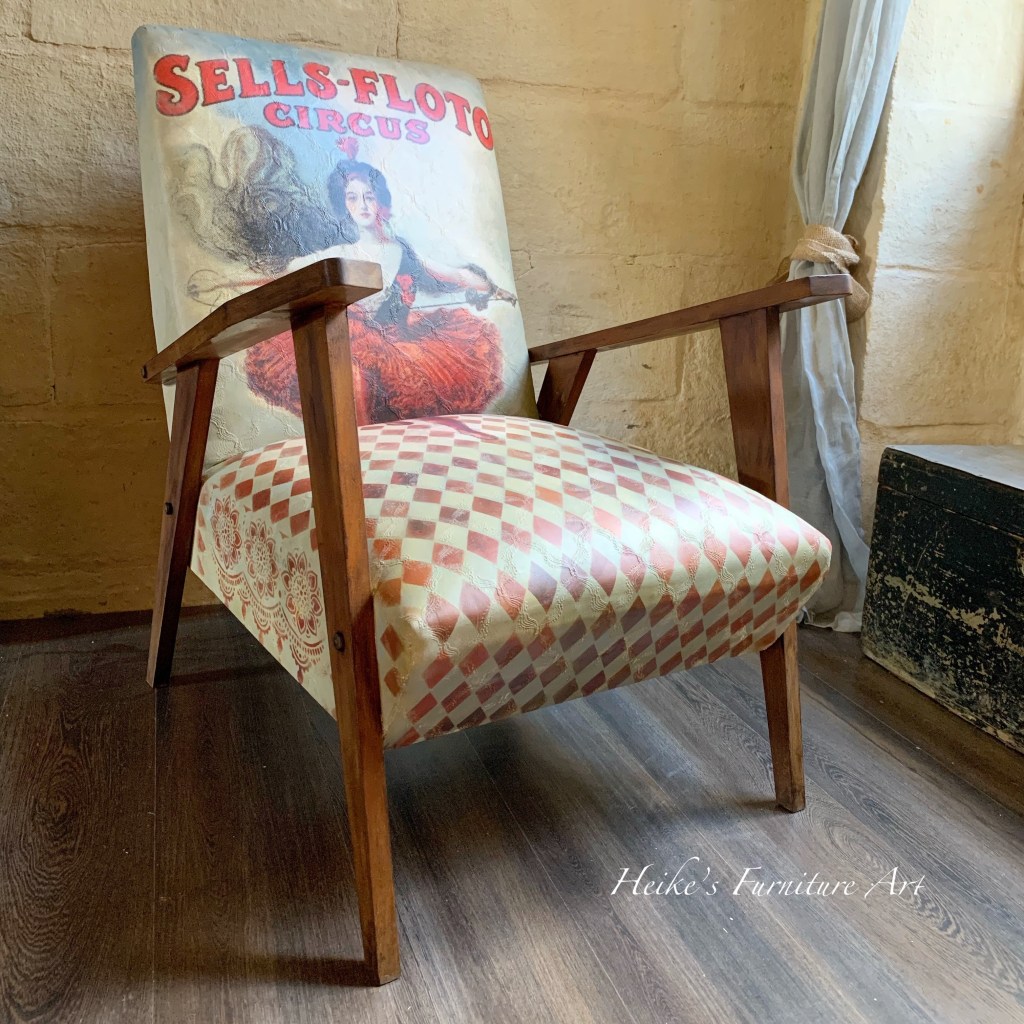
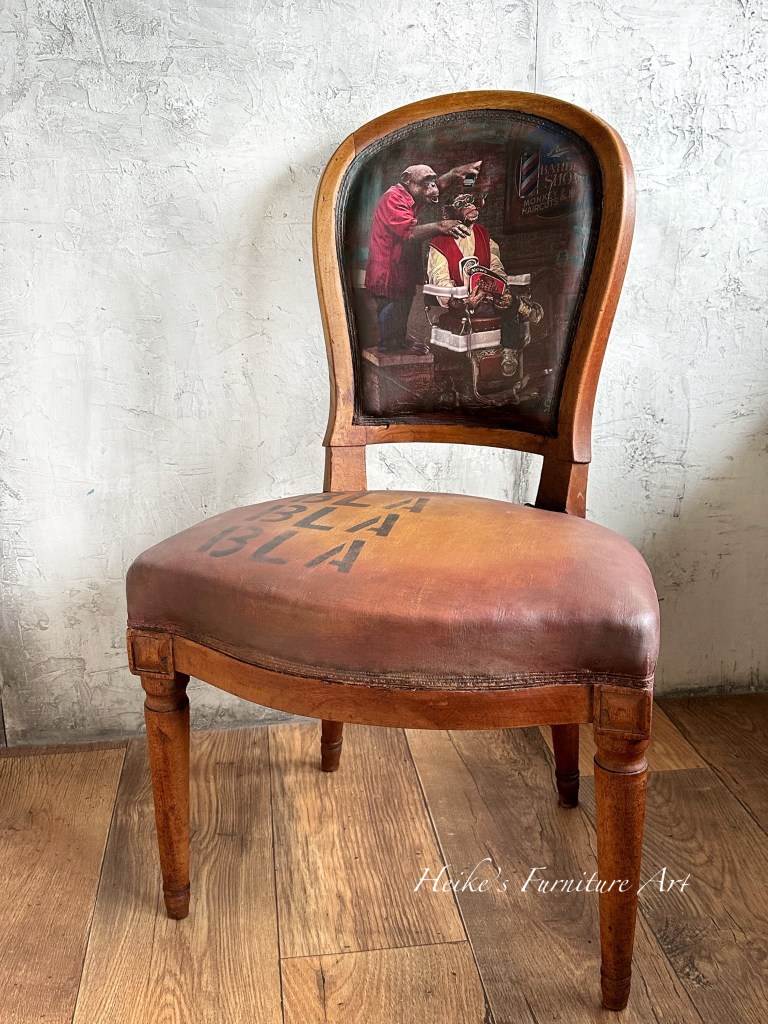
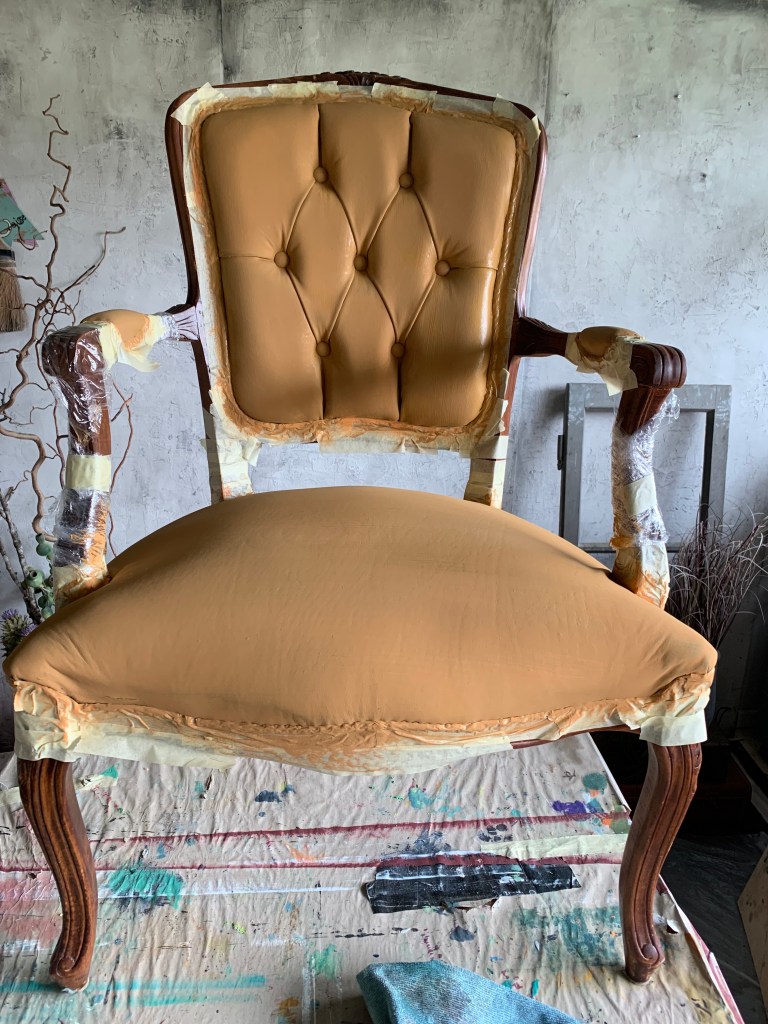
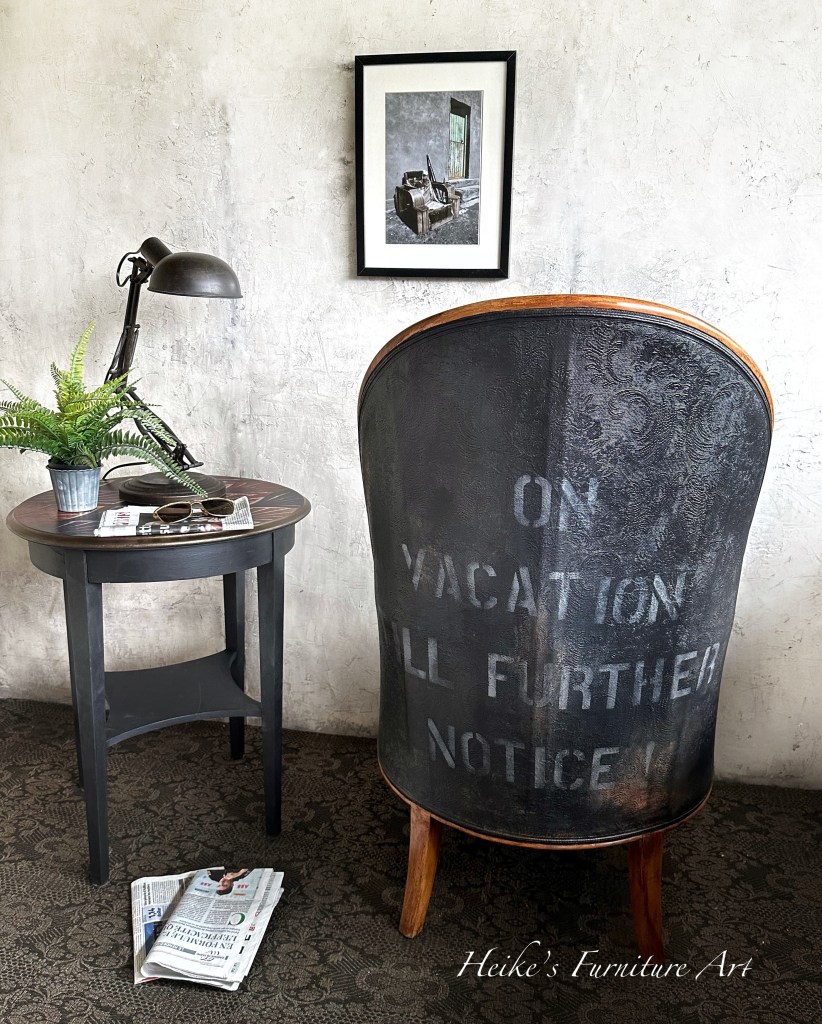
Here’s a few examples of painted chairs – fabric, leather, faux leather finish, vinyl


I work mainly with 2 different techniques and just added a third one to my bow. Thank you to my fellow colleague @Tracey’s Fancy. I’d like to walk you through these 3 different techniques. For you to choose which one you prefer because in the end they are all holding up well.
“DYEING” the fabric with watered down paint
This is the one I started off with and used it until not long ago. It’s quite a long process but I guess it’s the one us creatives use most of the times. Paint hardens so the finish has a leathery feel to the fabric. It’s not hard as rock but not as soft as before painting. Just so you know 😉 I’d say this is the most time consuming method and the fabric is not as soft as with the others. Still keep in mind that paint will “harden” your fabric more or less whatever method you use. Some people use fabric softener mixed with the paint. I haven’t done it yet.
What you need: a watermister, paint brush, watered down paint of your choice (I use both chalk paint and chalk mineral paint), sanding paper 250 and 400. Stencils and or decoupage/rice paper if wanted, wax or top coat.
- Vaccum your fabric to get rid of all the dust and dirt
- Wash the fabric with warm soapy water let dry
- Clean wooden structure, give a light sanding to give the paint tooth if you are going to paint it.
- Choose your color and water it down app. 40 paint to 60 water for the first 2 coats, then 50/50 water and paint. Stir every now and then because the good stuff settles at the bottom quickly.
- Mist your fabric all over. Make sure it’s wet so paint can adhere. Then apply your first coat. Let dry completely.
- Sand lightly, wipe clean.
- Repeat the process until you’re happy with the coverage. This can take a few layers
- Last time light sanding with 400 grid paper
- Create depth, shadows and highlights by layering your colors if wanted.
- Now apply any embellishments you want.
- Stenciling for example can be a good choice. I also like to apply decoupage paper, specifically on the front or back which can be less prone to problems opposed to on the seating.
- I have applied paper on the seating several times and my clients say it’s holding up fine. But if you’re worried then just apply the paper on the front or back backing. And you can of course also hand paint a design. I’m not good for that but might give it a try one day LOL
- Stenciling for example can be a good choice. I also like to apply decoupage paper, specifically on the front or back which can be less prone to problems opposed to on the seating.
- Apply topcoat for protection. I use water based top coat or wax. Brush on 2 very light coats of topcoat (let dry in between). Or use clear wax. Brush on, let it sit a few minutes and wipe off the excess. You can apply a second coat.
- You can now paint the frame of your chair – I usually paint it after I finished the chair. But that’s a preference thing.
- I paint it a solid color or do a wash.
- Sometimes I just leave the wood as is but give it a coat of darker wax to nourish and embellish.
- If painted you might need/want to protect the finish with a top coat or wax
There are many tutorials for the decoupage part. I also have a few on my YouTube channel if you’d like to check https://bit.ly/3nmiXPg
Here’s a short video that shows the first steps
USING WAX between layers
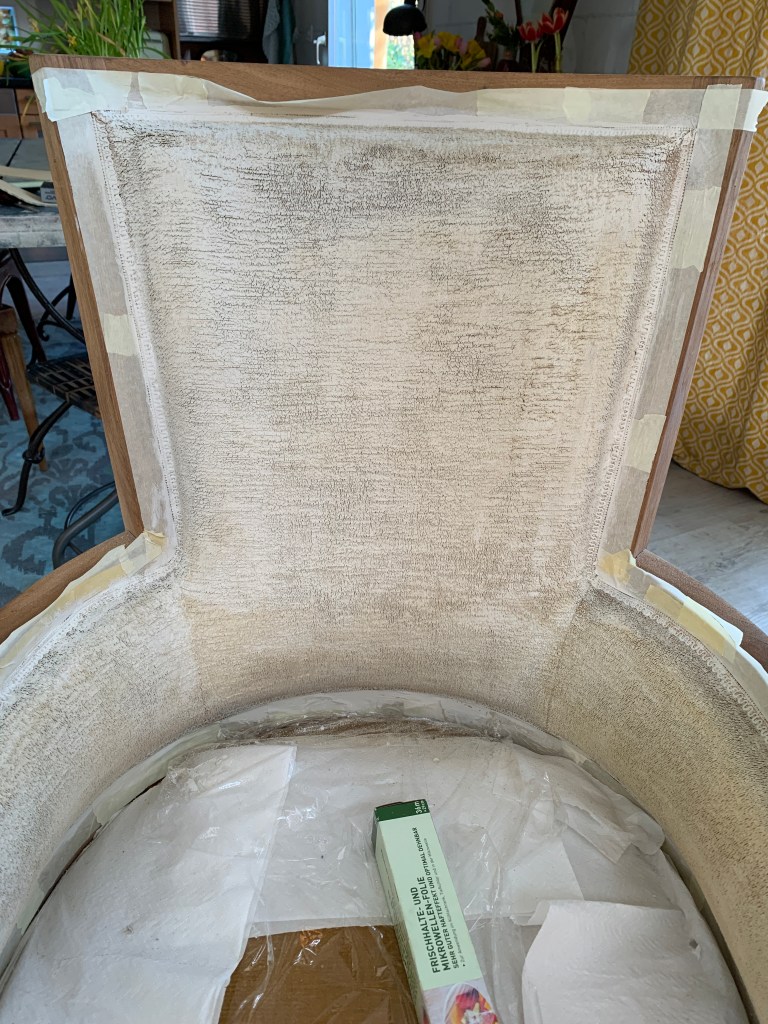
This technique caught my attention not long ago and I definitely love using it. It’s so efficient… Finish: Fabric stays very pliable, it’s softer to the touch than with the “dyeing method”. The wax helps to achieve that. Just don’t put thick layers of wax.
What you need: water based clear wax (this is VERY important. It will not work with oil based wax!) I use the clear wax from Dixie Belle Paint and color of your choice (I use both chalk paint and chalk mineral paint), sanding paper 400 grid, stencils, decoupage/rice paper, wax or/and top coat, water mister
- Prep and cleaning as previously. Let dry
- Take your water based clear wax and rub the wax into the fabric (use a paintbrush – a chip brush is just fine).
- Make sure there is enough wax all over the area but don’t overdo it. Once done it will have a humid/cold feel to the touch.
- Right after applying the wax apply your first coat of paint. Work in thinner layers not to add build up on the fabric.
- You can use a light mist of water so your paint brushes on easily…but don’t use so much water that your paint sinks into the cushion.
- You can also mist your paint brush now and again, that also helps.
- Let the paint layer dry! Don’t use a heat gun to speed it up as this will soften the wax underneath and you’ll have adherence problems afterwards.
- Give a very light sanding with the 400 grid paper – it really softens the fabric. Keep a very light hand because you don’t want to get down and activate the wax by using pressure.
- Building layers: Second round of applying wax like before and then applying paint. Have a light hand with the paint layers!
- You definitely need less layers and drying time than with the “dyeing fabric” method. I found that 2-3 layers of paint are enough to cover the initial fabric. If you have flat fabric like cotton for example your coverage is easier then having a textured fabric.
- The coverage also depends on the pigmentation of the paint brand you use.
- As above apply your embellishments once you’re happy with the coverage. You can always add some paint to blend or for your special design.
- Let dry everything
- Then use a top coat or wax. The good thing about water based wax? You can apply the wax and on top of it you can use a top coat. Which is not possible the other way round.
- Paint your frame or leave wood. Protect the finish with a top coat or wax.
Tip: I always decoupage before I paint “creatively”. The image then guides me to the colors to use for the rest of the chair and the final finish.
One important thing: if you apply decoupage then it’s best to have a light coat of paint (white) underneath the paper. That way is pops. If you have a darker color underneath your decoupage paper will blend in and it will be less crisp.
I did a tutorial on my You tube channel on this specific method. You can check it out here: https://bit.ly/3nmiXPg
And these are a few pieces I did with this technique:

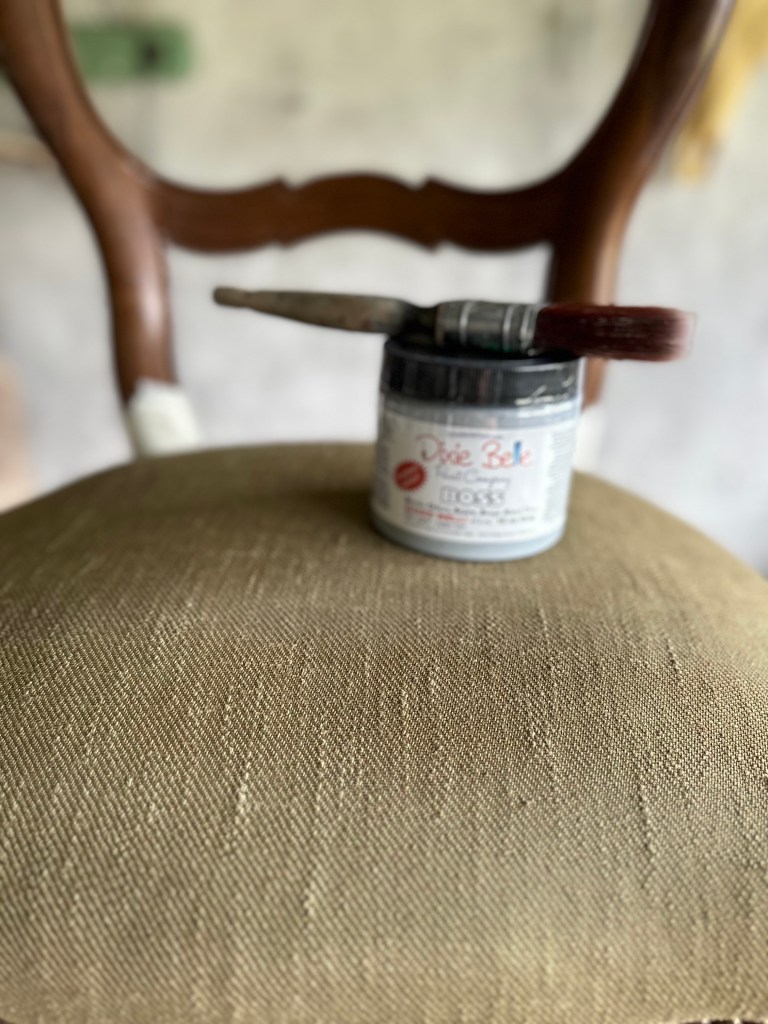
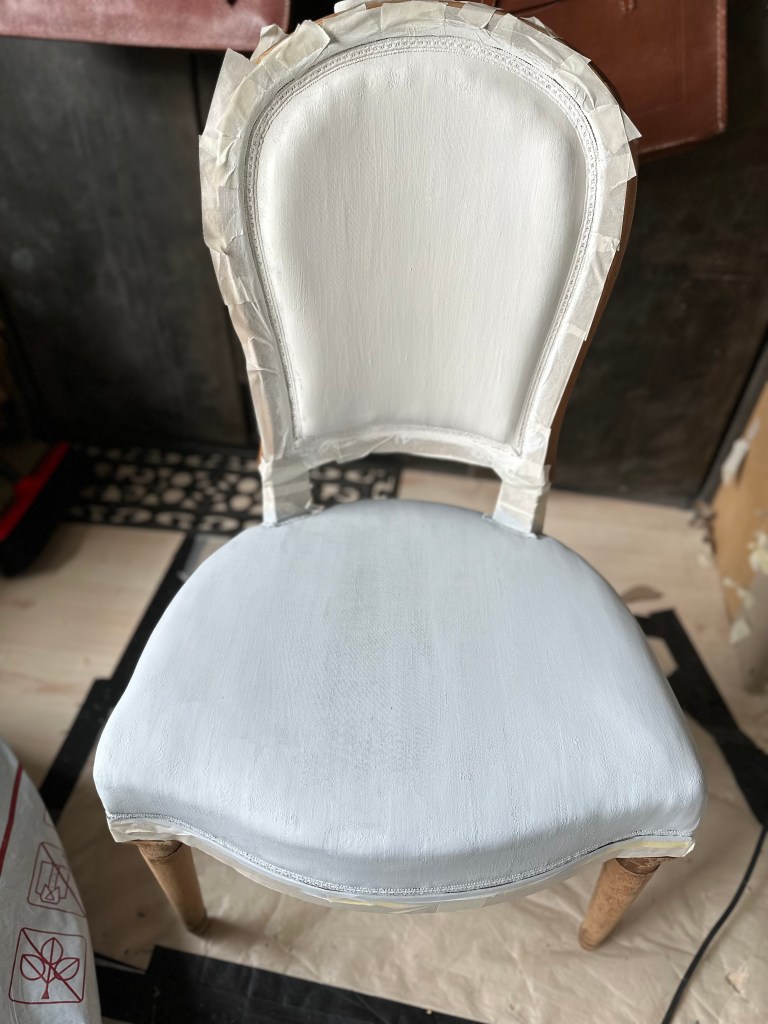
“USE PRIMER to create barrier”
This is a similar technique to the previous one. But instead of applying wax I’m using a primer. (I use Boss from Dixie Belle but I’m sure there are other brands)
Apply one or two coats of primer. My fellow creative colleague from Tracey’s Fancy uses this one on her whimsical creations. In my opinion this is a great method when you hand paint a design on your fabric upholstery. It’s also quite efficient 😉 The finish is not as soft as with wax though.
What you need: BOSS primer (white or grey), Paint and color of your choice (I use both chalk paint and chalk mineral paint), sanding paper 400 grid, stencils, decoupage/rice paper, wax or/and top coat, water mister.
- Prep and cleaning as previously
- Paint one or two coats of BOSS over fabric. Depending on the fabric texture and color. Let dry between layers.
- Sand very lightly with 400 grid paper. It gives a nice smooth touch.
- Paint the fabric of the chair with the color(s) of your choice. Work in thin! layers
- Sand lightly in between, wipe clean.
- Then feel free to create YOUR UNIQUE design using embellishments you like. See previous section. And why not hand paint something?
- Again work in thin layers not to add build up on the fabric.
- Protect your work with top coat or wax
- Paint your frame or leave the wood.
- Protect with top coat
After cleaning, just paint the primer over the fabric


Personally I love the wax method best 🤗😊
There are a few things to consider before starting to paint though.
First focus on what type of chairs are best to look for when considering them for this type of transformation – I always try them out, sit on them to see if they are comfortable. And then how to actually apply the paint and what my vision is ( this can change though 😂) Shall it be quirky, romantic, leather look, industrial style, whimsical…. So many possibilities. Use it as your canvas and just have fun!
Important
Best fabric to paint is a tight woven, flat one like cotton. You can also paint vinyl (I’d use a primer like Ultra Grip from Fusion or Slick Stick from Dixie Belle first though), faux leather, leather, linen, satin, denim, polyester…
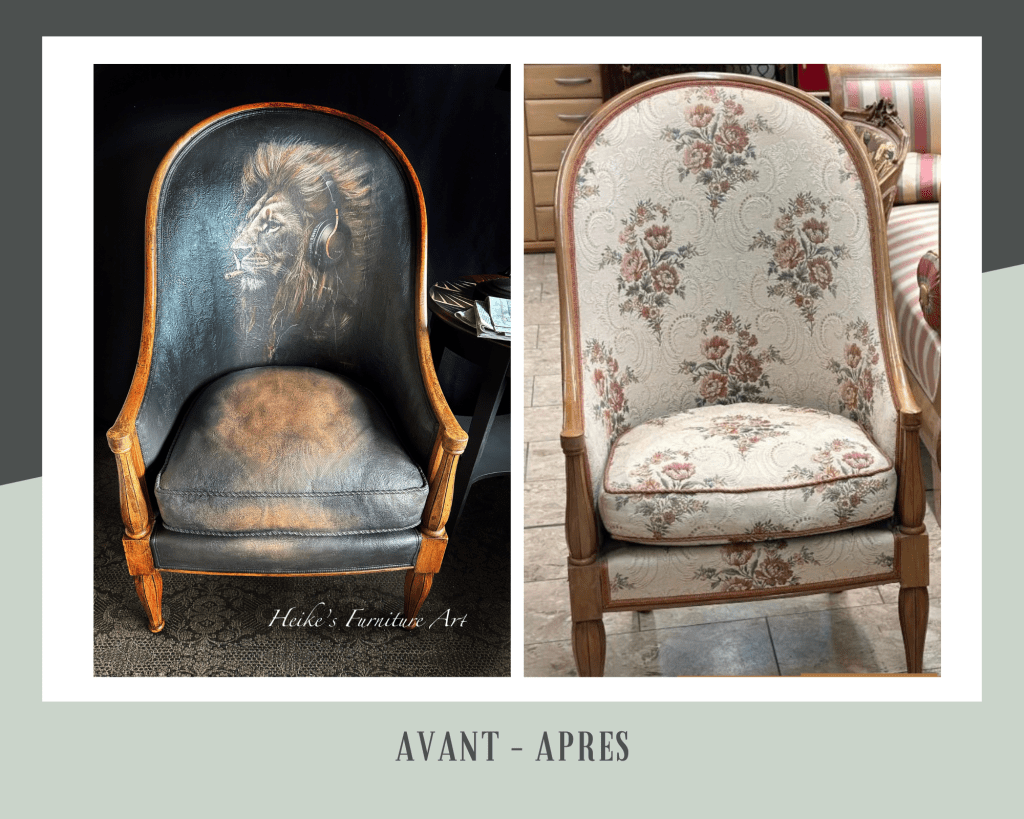
Here I painted a faux leather armchair. One of my first (nearly) painted chairs
It was a bit too boring before.
Prep and paint away.
I love creating old, worn leather looks. No decoupage here but some stenciling to enhance it all.
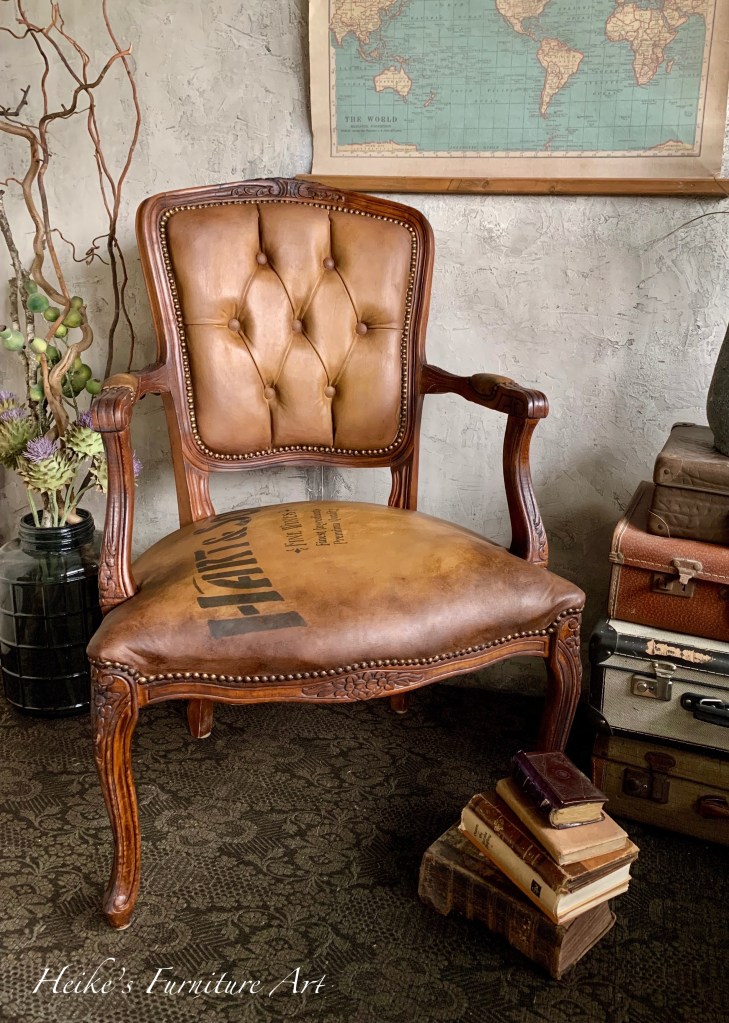
You can find a post on my blog here https://heikesfurnitureart.com/blog-2/ on how I did it and colors I used.
FAILURE
One thing I stay definitely away from is velvet or velvet like fabric, tweed and chenille. I’ve had terrible experience with these. And lately I’ve ruined a beautiful armchair – see below. I knew I shouldn’t paint that kind of fabric and still went for it. Well NEVER AGAIN…, I will listen to myself LOL
As a general rule…
…it’s best to paint on chairs that have firm cushions/seatings and that the upholstery is tight. When you find THE chair check following: make sure there are no tears and also have a look underneath that nothing is “unrepairable”. I’ve had my pair of surprises (torn fabric, loose wood, different heights of legs…) but because I liked them so much I forgot to check or just played blind 😬. Meaning more work. Much more work!
Avoid heavy textured designs. Sometimes I like the chair and still go for it. If you look at Leonardo le Beau you can make out quite a bit of the initial design but I think it’s just fine.

I hope I inspired you to give this a try! Surely you’ve got an unloved chair somewhere in your home, …. or you know someone who does….or found one at a flea market/charity shop that you’ve been wanting to transform…!
I also offer workshops where I teach you how to create your own unique chair in person. Feel free to get in touch. And there will soon be a step by step tutorial here on my website. Stay tuned.
Now go and have fun. Happy painting!
Heike

Thanks so much for this very informative email! I want to try doing a cool chair. I love Leonardo!! One question . Do u have to use decoupage “rice paper” on fabric or can u use a tissue too? That application still isn’t clear to me.
Thanks so much!!!
LikeLike
Hi Pamela You’re so very welcome! As for your question, rice paper or tissue paper – same procedure. I use both. The Leonardo paper is rice paper but for example Mint paper is tissue paper (or similar) What I find is that you need to mist your rice paper a little more so the fibers can “expand” whereas for the tissu paper it’s not really necessary but helps soften it a little.
Hope that helps?
LikeLike
Heike, You have inspired me tremendously. I have completed 2 chairs now having seen your beautiful work. I agree that wax method is best. It’s so much easier and the finished result is beautiful. I’m curious to know if you tried the wax method on velvet yet? Thank you,Melinda Martinez
Sent from Melinda’s iPhone
LikeLike
Oh my Melinda I think I totally missed your comment. I’m so sorry.
thank you so much for your feedback. it really makes me smile big when people give me this kind of feedback. It’s so appreciated.
I tried yes using the wax method on velvet – CATASTROPHE. I will never paint velvet again. I messed up a beautiful armchair. Tried everything to make it work with no luck. Then let it be for quite a while, went back to salvage what I could… But I’m definitely staying away from any velvet kind fabric, chenille or tweet or bathrobe fabric.
Once again, so sorry I missed your message
LikeLike
Heike,
You have inspired me tremendously. I have completed 2 chairs now having seen your beautiful work. I agree that wax method is best. It’s so much easier and the finished result is beautiful. I’m curious to know if you tried the wax method on velvet yet?
Thank you,
Melinda Martinez
LikeLike
so so happy you like the method and have been inspired to try it out. That makes me a happy girl 😉
I’ve tried to use it on the velvet armchair (that I messed up LOL) and it didn’t work for me… It’s a plushy long hair velvet I have so I can only talk about that one – I will NOT EVER paint fabric like this again. That being said, someone said you can paint velvet with the DIY paint and there’s a video on youtube of Debbie’s Design Diary who painted hers. But…. with the dyeing method!
LikeLike
What a great post Heike! I painted a couple of chairs six years ago which have worn very well. Of course at that time nobody was using decoupage. Your chairs are inspirational! I can’t wait to get started painting a new chair using some of your techniques and decoupage. Yanina
LikeLike
Good morning Yanina, thank you so very much for your kind feedback – I truly appreciate. So happy you enjoyed it and that it was helpful. Looking forward to see your creations in the near future. Please share! Have a lovely day
LikeLike
Oh Heike,
Thank you so much sharing your fabulous techniques and experiences.
I have WhimsyKel paper and just need the right chair.
I’m so excited to try this.
Again, thank you.
Jamie
LikeLike
You’re so welcome 🤗 It always makes me happy to read this kind of feedback. I really appreciate.
I love Kelly’s designs – her animals are totally my thing at the moment 😅
Did you know I’m holding a live online class on how to paint and decoupage fabric on an armchair? Feel free to check the “painting tutorials” page on the website for more information.
LikeLike